Cinnamon Rolls
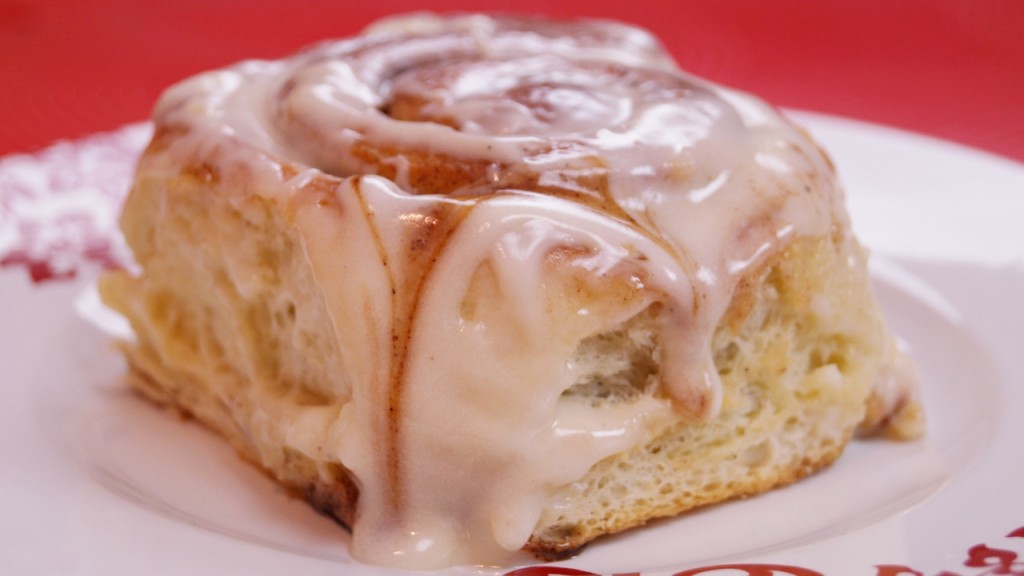
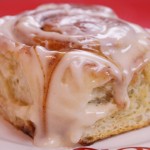
Cinnamon Rolls (Buns) Recipe! Learn how to make the Best Cinnamon Rolls From Scratch with my Easy to follow Step-By-Step Recipe and Video! These bakery style Cinnamon Rolls (Buns) are sweet, tender, big, rich and filled with cinnamon sugar and butter, then topped with cream cheese frosting (icing). If you like the famous Cinnabon Rolls or the Main Street Bakery Cinnamon Rolls at Magic Kingdom in Disney World, then you should try these homemade buns! I’m not saying they’re like those, but they are darn good and can compete with any bakery style cinnamon roll recipe. They’re Simply Delicious! Dessert for Breakfast! Mmmm
Note: These Cinnamon Rolls are made with yeast and with milk. I use a stand mixer with a dough hook and paddle to make the dough, but it can easily be made by hand.
Try to stop drooling at the pictures long enough to read the directions and watch the video before you make these cinnamon rolls. This is not a difficult recipe! Actually, it’s pretty easy. It’s really like making a cake or any other batter, but the difference is that the dough just needs time to rise. It’s not a bad thing, since it gives you time to clean up and then you can go do something else or watch some of my other videos while you wait. I was a little camera-shy in the beginning, so be kind if you watch the older ones. So anyway, as with any recipe, be sure to get all of your ingredients measured before you start and watch the video as you go through the recipe, that way it will seem like we’re baking in the kitchen together! Good luck and be sure to take a photo of the completed recipe and post it to my Facebook Page or other social media. I just love seeing people recreating my recipes. It warms my heart. Enjoy! Di 😉
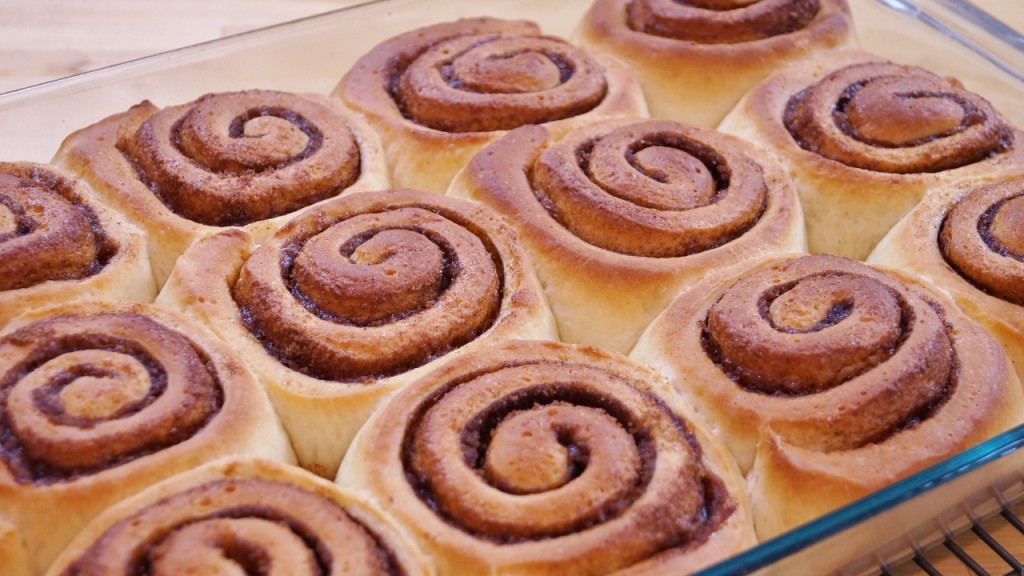
Btw, if you don’t want to put the cream cheese frosting on the rolls, I can tell you from experience they taste great with some butter. I like to unravel them, spreading butter on each piece as I go along. Take a look at this photo below and tell me you can’t imagine doing the same exact thing! You better get busy and start baking!
Cinnamon Rolls
Important Recipe Info! Please Read!
In this recipe you will be scalding the milk. It’s really easy so don’t get nervous . Scalding is simply heating the milk to 180-190 degrees F, which is basically about the time it starts to simmer. So, why scald the milk? Because some milk proteins unfold from their native chain or globular shape at scalding temperatures. I know this sounds like science class, but it’s pretty interesting stuff. Anyway, this unfolding is known as denaturing proteins. The denaturing helps in bread making, (cinnamon rolls are made with sweet yeast bread), resulting in a better rise and a finer crumb. Light and tender cinnamon rolls! Yay! So, why not just use water instead of milk? Good question! Milk solids make the gluten connections in the dough slightly weaker. This creates bread with a more tender crumb and a mellower taste. So, by using scalded milk these cinnamon rolls will be light, tender and delicious!
How to scald milk: You can do this on the stovetop in a small pot or in the microwave, in a large cup. I’ve done it both ways and I prefer the microwave using a glass measuring cup. I have to measure the milk anyway, so it saves me on clean up. So, you just pop the milk in the microwave on high and then heat it for about a minute and give it a stir and then heat again at about 45 second intervals, until the milk gets to 180-190 degrees F. It’s best to use a thermometer to check the temperature, but you can tell when it’s scalding, because it will get very hot and steamy and tiny bubbles will start forming around the edges of the cup. It also starts to form a bit of a skin. Now be careful, because it starts to boil soon after scalding, so be sure to keep an eye on it, so that doesn’t happen. Be very careful when you remove the cup from the microwave, as it may become very hot. If you scald the milk on the stove, place a small pot over medium heat and stir the milk constantly, to prevent it from sticking to the bottom or scorching. Don’t get impatient and turn the heat up because you will definitely scorch it. Once you’ve scalded the milk in the pot, place it into a heatproof cup, like a glass measuring cup, so it can cool down. So now you know how to scald milk in the microwave and on the stove. Yay! I can feel your excitement. You can check that one off of your list now! Lol
About the Flour
You will need to adjust the amount of flour to make the dough according to the environment in your home. Here’s a quick look at what to expect.
If the air is dry, the flour will be dry.
If the air is humid, the flour will absorb the moisture in it.
(Note: In the video I say the “temperature” of the flour and of your home, but I meant humidity)
Dry flour is like a dry sponge, which can soak up more water than a wet sponge. That means, that during cold, dry months, less flour is needed to make a dough and in hot, humid months, more flour is needed.
Start with the least amount of flour and if you need more, than add one tablespoon at a time, kneading thoroughly after each addition. I do this by first measuring the least amount of flour (5 1/4 cups poured and leveled (21 oz. or 615 grams) and then I put the difference in a small bowl, which is usually several tablespoons. This way you’re not just going to randomly dump flour into the dough and you’ll know if you’re about to exceed the maximum amount of dough stated in the recipe (660 grams or 23 oz. – 5 2/3 cups poured and leveled). Too much flour can make the rolls dry. Sometimes I take the dough out of the mixing bowl and knead by hand, when I feel like it’s getting close. That way I can feel the doughs’ texture and elasticity, which lets me know if I should add more flour or not. Make notes regarding the amount of flour used and the weather conditions at the time – was it a humid summer day, was it raining, was it winter and the air dry from using the heater. This will help you text time you make the recipe. The dough hook on these mixers isn’t the best and it may just take a minute or two of hand kneading to get it to come together. That’s why I use the paddle attachment to get the dough ingredients combined in the beginning. Well, good luck and be assured that even if these rolls aren’t absolutely perfect on your first try, they will still be incredible! Trust me! I’ve made many batches and have always received rave reviews, even when I knew I messed up. People are just really excited and impressed when you make homemade cinnamon rolls! It’s not an everyday occurrence for them. So, have fun and get a pot of coffee going, so when these babies are done, you can just dig in, because they are the absolute best, fresh out of the oven. Di
Cinnamon Rolls
Want to see more cinnamon bun recipes or sweet roll recipes? Or how about Sticky Buns, Monkey Bread or even Cinnamon Raisin Bread? Request a recipe or leave me a comment! Go to the comments section for this Recipe on YouTube or visit my Facebook Page! What you’re craving could be my next recipe!
If you like these Homemade Cinnamon Rolls, you may also like some of my other breakfast, bread or dessert recipes! (Especially my Coffee Cake Recipe!) So browse around my site and then get in the kitchen and make something delicious!
**All recipes are tested – sometimes over and over again LOL
Watch The Video Recipe Demonstration!
Learn How To Make Cinnamon Rolls (Buns)! Recipe by: Diane Kometa
*SUBSCRIBE HERE*
Subscribe for FREE to Dishin’ With Di’s YouTube Channel for the latest recipes!
Don’t Miss An Episode!
Cinnamon Rolls (Buns) Recipe
Ingredients:
- Dough
- ¾ cup milk (not non-fat)
- 6 Tbs. cold unsalted butter – cut into pieces
- 1 teaspoon salt – I use fine sea salt
- 1 ½ tsp. pure vanilla extract
- 2 packets dry active yeast – 14 grams – 4 ½ teaspoon
- 1/3 cup water
- ½ cup sugar (1 teaspoon of this will be used to proof the yeast)
- 5 ¼ – 5 2/3 cups (21-23 oz. or 615-660 grams) all-purpose flour – Poured and Leveled, plus more flour for rolling, if needed
- 2 large eggs – room temperature – lightly whisked
- Vegetable oil or non-stick baking spray for bowl
- About the flour: Start with 5 ¼ cups (615 grams) of flour. Keep the additional flour (approx. 2 ounces or 35 grams) in a separate small bowl to be used, if necessary, for kneading and flouring your work surface. If you need more flour, use 1 tablespoon at a time, even if it’s used to flour the board. Keep notes, so when you make the dough again, you will know how much flour was used.
- Filling
- 2 Tbs. ground cinnamon
- 1 cup light brown sugar – firmly packed – about 215 grams
- 4 Tbs. butter – melted and cooled
- Butter or non-stick spray for greasing the pan or baking dish
- Topping – Cream Cheese Frosting
- 4 ounces cream cheese – softened – 113 grams
- 4 Tbs. butter – softened –
- 1 ½ cups powdered sugar – also known as confectioners’ sugar or icing sugar
- 1 tsp. pure vanilla extract
- Special Equipment:
- Large glass baking dish or metal baking pan – I used a 10×15 inch glass baking dish
- Instant read thermometer or candy thermometer – for accuracy – if you have one
- Stand Mixer with paddle and dough hook OR By hand: large mixing bowl and sturdy spoon
- Rolling pin
- Pastry brush
- Plastic wrap
Directions:
- Scald Milk: place the milk into a microwave safe cup and heat on high, stirring occasionally to ensure even heating. Once the milk is hot and steamy, begins to bubble slightly around the edges and starts to form a film or skin on the surface, the temperature should be between 180-190 degrees F, which is scalding. Remove from heat and then stir in the cold butter, salt and vanilla to combine. The cold butter will lower the temperature of the scalded milk, but the milk should still be warm when added to the flour. Set aside. Scalding can also be done on the stovetop in a small pot, over medium heat, stirring constantly. Immediately transfer the milk to a heat proof cup or glass measuring cup, before adding the butter. Do not heat the milk over too high a heat, as it will stick to the bottom of the pot and may scorch. Why scald the milk? At scalding temperatures some milk proteins unfold or lose their shape known as denaturing, which will result in a better dough rise and cinnamon rolls that are light and tender.
- Proof Yeast: Heat the water to 110-115 degrees F. Alternately use hot tap water, but that may be up to 120 degrees F, so allow it to cool to 110-115 F. Add 1 teaspoon of the sugar to the heated water and mix thoroughly with a fork. Pour in the yeast and mix with the fork until dissolved. Set aside for 5 to 10 minutes, until the mixture becomes very foamy. If foaming does not occur, you cannot proceed with the recipe, as the yeast may be bad or the water may not have been in the required range to activate the yeast; if it’s too cool and yeast does not activate, too hot and they die.
- Make Dough: If you do not have a stand mixer, the following steps can be done by hand using a large bowl with a sturdy spoon and your hands and work space for kneading the dough. Into the bowl of a stand mixer fitted with the paddle attachment, add the flour and remaining sugar. Turn the mixer on and combine thoroughly. Add the activated yeast mixture to the flour and turn the mixer on low. Slowly pour in the warm milk and butter mixture. Add half of the whisked eggs and mixed thoroughly and then add the rest. Mix on low for about 2 minutes, until the mixture is thoroughly combined. At this point the dough will be very sticky. Scrape the dough off of the paddle and switch to the dough hook. (The next part can be done on the counter, kneading by hand, if you do not have a mixer, but may take longer than stated.) Knead with the dough hook for about 5 minutes, until the dough is smooth and elastic and cleans away from the sides and the bottom of the bowl. At 5 minutes of kneading with the hook, if the dough is still very sticky, add 1 tablespoon of the reserved flour and continue kneading for another minute or two, until the dough absorbs the flour. Repeat if needed, but too much flour will make the rolls dry. If you are unsure, lightly flour your work surface with some of the reserved flour and knead the dough by hand for a minute or two to feel the texture. When it becomes smooth and elastic, you are done.
- Proof Dough – Dough Rise –: Grease a large bowl with non-stick spray or vegetable oil. Remove the dough from the bowl and knead slightly on a lightly floured work surface and form into a ball. Place the dough ball into the greased bowl and turn it over to thoroughly coat with oil. Cover the bowl with plastic wrap, leaving enough room for the dough to rise. Set the bowl in a warm place for 1-2 hours, until the dough has doubled in size. Do not allow the dough to rise too long, as it can make the rolls chewy. Be sure to place the bowl away from any drafts or air conditioning vents. I place it in the microwave where it’s out of the way, warm and cozy.
- Make Filling: In a bowl, thoroughly combine the brown sugar and cinnamon. I use my hands to be sure the brown sugar is completely broken up. Place the melted butter in a separate bowl. Grease the baking dish with butter or non-stick spray. Set aside.
- Roll Dough: Lightly flour work surface. Punch down the dough and then turn out onto floured work surface. Use your fingertips and press into the dough to help release the gases and begin to shape it into a lengthwise rectangle in front of you. Lightly flour a rolling pin and roll the dough into a 14×18 inch rectangle. I use a ruler to make sure it’s even.
- Add Filling: Use a pastry brush and brush the cooled melted butter over the surface of the dough, leaving a ½ inch border around the edges. You may not need all of the butter. Sprinkle the brown sugar and cinnamon mixture over the butter and spread evenly, leaving a ½ inch border of dough showing around the edges. Brush the edge of the dough closest to you with a little bit of water, which will aide in sealing the roll.
- Roll Dough into Log: Slowly roll the dough toward you to form a log. Do not roll it too tight or the centers of the rolls will pop up when rising and/or baking. Try to keep the sides of the log even as you roll. Press the moistened edge to seal the log. Trim the ends of the log with a serrated knife.
- Cut Dough into rolls: Using a sharp serrated edge knife, such as a bread knife, cut the roll in half in a gentle sawing motion, so the dough does not squish down. Then cut each half in half creating 4 pieces. Cut each piece into 3 pieces, creating 12 rolls total. Place each roll, cut side down into the prepared baking dish or pan.
- Proof Cinnamon Rolls – Second Dough Rising: Cover the baking dish with plastic wrap, leaving some room for the rolls to rise. Place the rolls in a warm area for about 1 hour or until they have doubled in size.
- Bake Cinnamon Rolls: Place oven rack in the center position and preheat oven to 350 degrees F, while the rolls rise, to allow the oven enough time to heat thoroughly. Bake the cinnamon rolls for about 23-28 minutes or until golden brown and a tester inserted into the center comes out clean. If you tap on the tops of the baked buns they should sound hollow. Set on a rack to cool for about 5 minutes, before adding the topping.
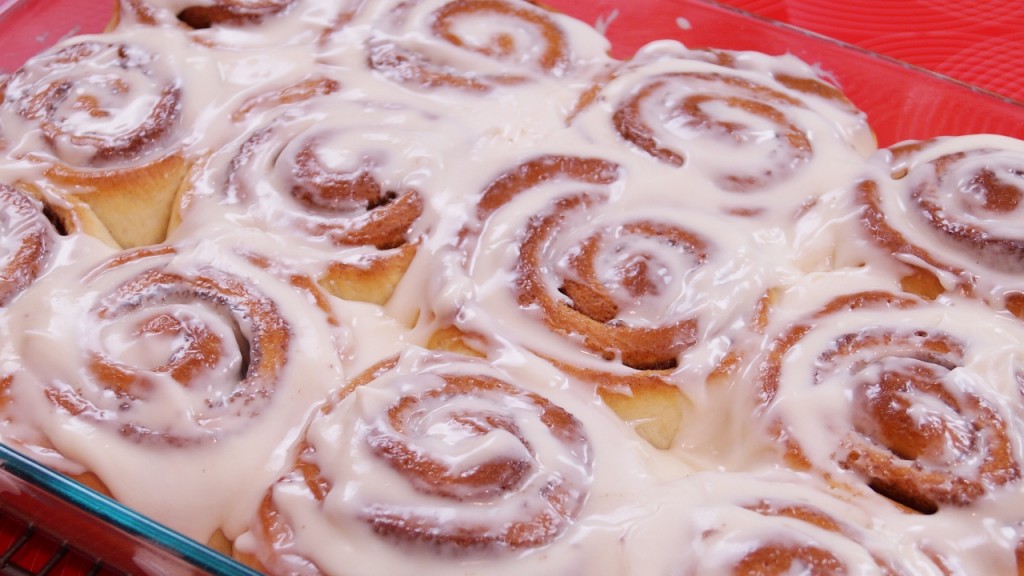
- Make Cream Cheese Frosting Topping: While the rolls bake, make the cream cheese frosting / glaze. Place the softened cream cheese into the bowl of a stand mixer fitted with the paddle attachment or into a mixing bowl using a hand mixer. Beat the cream cheese for about a minute until smooth and creamy. Add the butter and beat until thoroughly combined and creamy. Add the vanilla extract and beat to combine. Add half of the powdered sugar and mix on low until combined and then add the rest. Mix for about 2 minutes until smooth and creamy. Spread the frosting over the tops of the warm cinnamon rolls. Remove rolls from pan, by cutting them apart.
- EAT Cinnamon Rolls!!!! Serve and enjoy! There are no words to describe these, so sounds will just have to do! Mmmm!!!! Enjoy! Di 😉
- Note: The baked cinnamon rolls can be stored at room temperature for about 24 hours in an airtight container or refrigerated for about 3 days. I have reheated leftover rolls the next day in the microwave for about 10 seconds on high and they got their freshly baked texture right back. I don’t know what happens after 3 days, because they never last that long! Recipe by: Diane Kometa
Tagged: American, bakery, best, bread, bread recipe, breakfast, brown sugar, buns, butter, Cake, cheese, Christmas, cinnabon, cinnamon, cinnamon buns, cinnamon rolls, cream, cream cheese, demonstration, Dessert, Desserts, Diane Kometa, Dishin With Di, dough, dry active yeast, Easter, easy, eggs, extract, famous, filling, flour, from scratch, Frosting, glaze, homemade, How To Make, Icing, light, making, milk, muffins, New Year's, Old Fashioned, powdered sugar, proof, proofing, Recipe, rising, roll, rolling, rolls, salt, scalded, Simple, sugar, sweet rolls, tender, Thanksgiving, topping, tutorial, Valentine's Day, vanilla, vegetable oil, video, water, yeast, yeast rolls, YouTube
